
How Do You Pass a Duct Leakage Test on a Commercial Ductwork Fabrication Job in British Columbia?
A duct leakage test caps the open ends of a finished duct section, pressurizes it with a calibrated fan, and measures how much air escapes. The section passes when that leakage stays under the allowance the spec sets from the leakage class, the test pressure, and the duct’s surface area.
Failed sections tend to leak at the same few places, such as transverse joints, seams, access doors, and the test caps themselves. Across Metro Vancouver and the Fraser Valley, runs built to the spec’s seal class and tested before the ceiling closes have the best odds.
What Is a Duct Leakage Test on a Commercial HVAC Job?
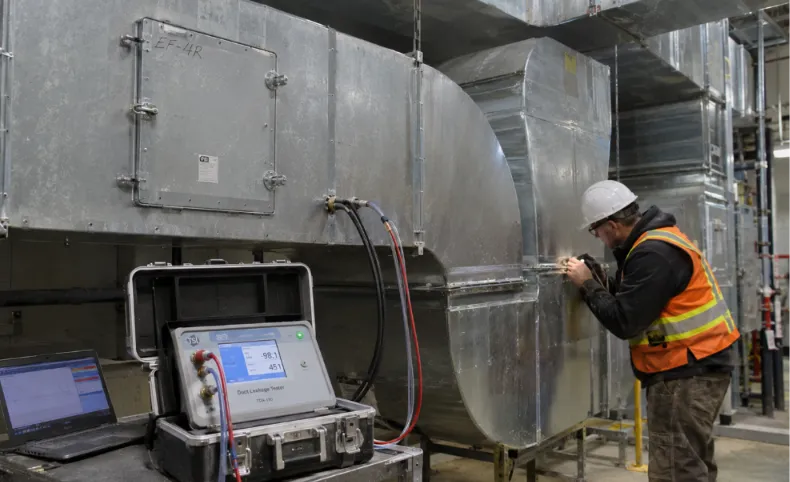
A duct leakage test is a pressure test on one isolated section of finished ductwork, measured against the leak allowance the project sets.
Unlike a visual inspection, this process provides a measurable result that can be compared with the project’s allowable leakage limit. It helps determine whether the tested duct section meets the airtightness requirements established by the mechanical specifications.
Why Do Commercial HVAC Contractors Need to Pay Attention to Duct Leakage?
Leaky duct delivers less air to the outlets it was sized for, so the fan works harder and the balancer chases airflow that never arrives. A failed test also costs schedule, because every reseal means a retest.
A successful test helps confirm that the tested ductwork meets its specified leakage criteria. It does not replace airflow balancing, equipment commissioning, or other required mechanical inspections.
What Should You Check Before Starting a Duct Leakage Test?
Before arranging testing, review the mechanical drawings, specifications, and approved shop drawings. These documents should establish the test requirements and identify the duct sections that fall within the testing scope.
Pre-Test Checklist for a Commercial Duct Leakage Test
Test Pressure
Confirm the static pressure each section is tested at. The spec usually ties it to the duct’s pressure class, so a run built for 500 Pa (2 in. w.c.) is tested at that pressure. Sections with different classes get different test pressures.
Pressure Class
The duct pressure class is the pressure the duct was built to hold, and it sets the gauge, joints, and reinforcement. Never test a section above its class, because the joints and reinforcement weren’t built for that load.
Leakage Class
The leakage class is the tightness the test checks the duct against, and the spec names it for each system. It isn’t the seal class, which says which joints and seams get sealed in the shop and on site. Note the class for every section, because it sets the allowance.
Test Boundaries
Mark where each section starts and stops, and list every branch, opening, and fitting inside it. Anything left open inside the boundary leaks into the reading.
Testing Percentage
Some specs test every run, and others test a set share of each system. Confirm the share, and who picks the runs, before the first test.
Access
Test before insulation goes on and before the ceiling closes. A leak found on the day can then be resealed without opening finished work.
Reporting
Ask which records the engineer wants back. That’s usually the section, its surface area, the test pressure, the allowance, the measured leakage, and the result.
How Is a Commercial Duct Leakage Test Carried Out?
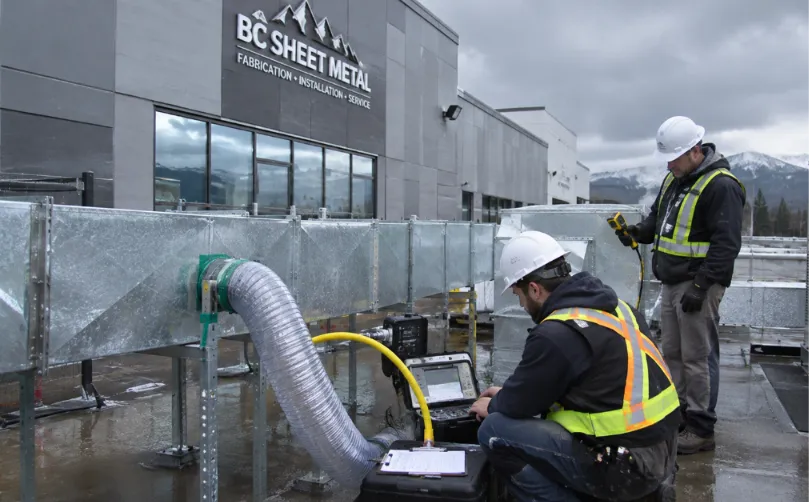
A commercial duct leakage test runs in six steps, from picking the section to signing off the result.
1. Select the Test Section
Pick the run from the drawings and the spec’s testing share. Work out its surface area, pressure class, and leakage class first, because all three set the allowance.
2. Establish the Test Boundaries
On site, check that nothing inside the section is still open. Unfinished branches and unconnected takeoffs are the usual surprises, so close them off or move the boundary.
3. Seal the Duct Openings
Cap every open end with a rigid blank or test plug, sealed at the edge. A cap that bows or lifts under pressure adds leakage that isn’t the duct’s fault.
4. Connect the Testing Equipment
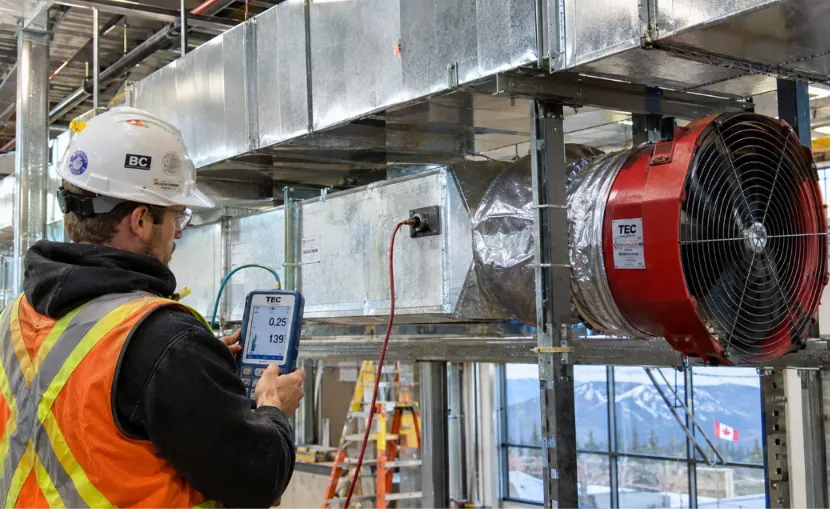
Connect the calibrated test rig, a fan with an airflow meter, to one opening. A separate tap reads the static pressure inside the duct.
5. Apply Pressure and Measure the Leakage
Bring the section up to its test pressure slowly and hold it there. The airflow the fan needs to hold that pressure is the leakage. The SMACNA method accepts positive pressure for negative-pressure duct.
6. Evaluate and Document the Results
Compare the reading with the allowance and record the test conditions. A failed section has its leaks found and resealed, then waits for the sealant to cure before it’s tested again.
How Do You Calculate the Allowable Duct Leakage?
The allowable duct leakage is the leakage factor for the test pressure, multiplied by the section’s surface area in hundreds of square feet. SMACNA sets the factor as F = CL × P^0.65, where CL is the leakage class and P is the test pressure in in. w.c.
For example, take a 46.5 m² (500 sq ft) section with leakage class 4, tested at 500 Pa (2 in. w.c.). The factor is about 0.32 L/s per m² (6.3 CFM per 100 sq ft), so the section may leak up to 14.8 L/s (31.4 CFM). These figures show the method only, and your spec’s leakage class, test pressure, and surface area set the allowance on your job.
How Do You Read a Duct Leakage Test Result?
A reading of 12 L/s (25 CFM) is under the 14.8 L/s allowance, so the section passes. A reading of 17 L/s (36 CFM) is over it, so the section is resealed and retested.
Work out the allowance before the test day, so the crew knows the number it has to beat.
What Causes Commercial Ductwork to Fail a Leakage Test?
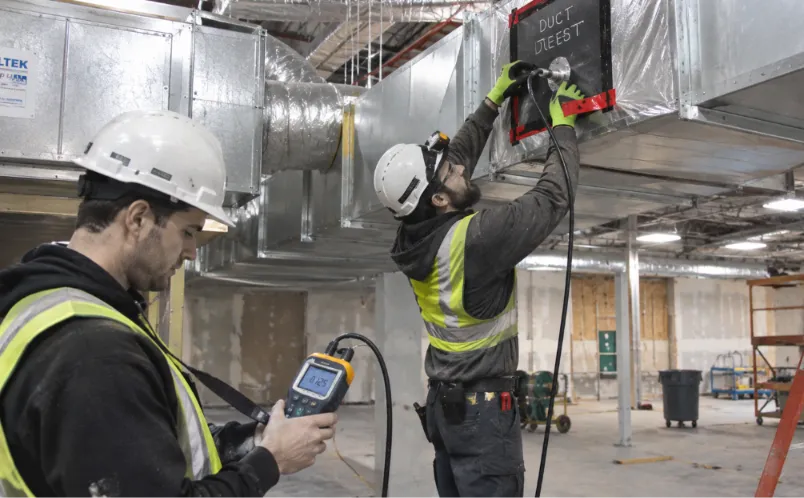
Commercial ductwork usually fails a leakage test at its joints, seams, access doors, or penetrations, or at a test cap that wasn’t sealed. Find the leak before assuming the whole section needs replacing.
| Leak point | Why it leaks | What fixes it |
|---|---|---|
| Poorly formed seams | Incomplete or inconsistent seam construction | Reseal the seam, or remake the piece if the seam is open |
| Loose transverse joints | Incorrect fit or not enough sealant at the connection | Refit the joint, tighten its connectors, and reseal it |
| Misaligned fittings | Gaps between transitions, elbows, and the sections they join | Realign or remake the fitting, then seal the joint |
| Access door problems | Damaged gaskets or panels not fastened properly | Replace the gasket and refasten the panel |
| Installation damage | Dents or distortion pulling joints out of line | Straighten or replace the section, then reseal its joints |
| Unsealed penetrations | Gaps around hanger fasteners, rods, and damper shafts | Seal around each penetration |
| Field modifications | New openings or connections left unsealed | Seal or cap them before the retest |
| Test caps | Caps bowing or not sealed at the edge | Reseat and seal the cap, then retest |
| Uncured sealant | Test run before the sealant had set | Wait out the sealant’s cure time, then retest |
Fabrication faults and installation faults look alike on a failed test. A section can leave the shop square and tight, then lose that seal to rough handling or a poor field connection. Flexible connectors, dampers, and equipment connections can leak too, if they sit inside the test boundary.
How Can Duct Fabrication Quality Reduce Leakage Risks?
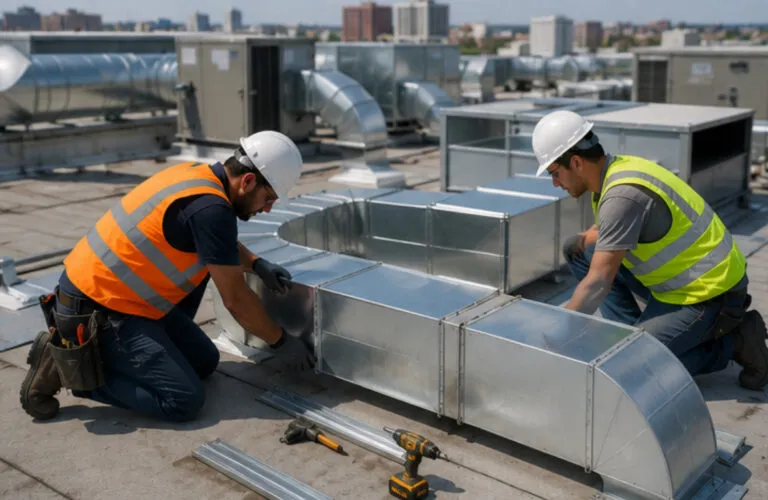
Good fabrication cuts leakage risk because sections that fit square seal cleanly, while forced joints leave gaps the sealant can’t close. Accurate cuts and bends, consistent forming, properly prepared edges, and suitable connection details help contractors assemble the duct network without excessive field adjustments.
For example, an incorrectly sized transition can create alignment problems where it connects to a straight duct section. A poorly formed edge can make joint assembly more difficult. Even when the installer uses appropriate sealing materials, inconsistent fit-up can add time and create opportunities for workmanship issues.
In the shop, fabrication quality means seams formed tight and square, joints made to the spec’s seal class, and each section labelled for its run.
What to Settle Before the Duct Is Fabricated
- Approved shop drawings and duct dimensions.
- Specified sheet metal material and gauge.
- Duct pressure class and construction details.
- Seam and joint requirements.
- Fitting geometry and connection dimensions.
- Access openings and service requirements.
- Handling, storage, and delivery arrangements.
The type of material also matters. Galvanized steel is widely used for many conventional HVAC duct applications, while stainless steel may be specified for particular commercial, industrial, high-moisture, or exhaust environments. The selected material and construction method should match the design and project requirements.
Grease duct is a separate case, because NFPA 96 sets its own leakage test rather than the SMACNA method.
Why Choose Duct Duct Goose for Commercial Duct Fabrication in British Columbia?
Duct Duct Goose builds ductwork to the spec’s pressure and seal class, following SMACNA on every job with the engineer’s spec on top. We’re a sheet metal fabricator in Pitt Meadows, serving contractors across Metro Vancouver and the Fraser Valley.
We work in galvanized, stainless, aluminum, and mild steel, using CNC cutting, brake forming, seam-forming, and welding equipment to produce project-specific components. Our HVAC ductwork fabrication services cover commercial duct sections, while our custom duct fittings include elbows, reducers, transitions, and other components. We also provide stainless steel ductwork fabrication for projects that require stainless steel construction.
Send your drawings early, and we’ll check the pressure class, seal class, and fit-up details before the first cut. Book an estimate or call (604) 924-6744. For ductwork and fittings, WebDuct gives instant pricing and ordering once your company has an account.
Frequently Asked Questions
1. Is duct leakage testing required on every commercial project in BC?
Duct leakage testing isn’t required on every commercial project in BC by default. The engineer’s spec names the systems, the share of duct, the test pressure, and the leakage class. The authority having jurisdiction has the final say.
2. Which standard is used for duct leakage testing?
The standard used for duct leakage testing is usually the SMACNA HVAC Air Duct Leakage Test Manual (ANSI/SMACNA 016-2012). Check the project specification for the standard and edition it names.
3. What happens if ductwork fails a leakage test?
When ductwork fails a leakage test, the installing contractor finds the leaks, reseals them, and lets the sealant cure. The section is then retested at the same pressure, and both results go into the project records.
4. Does a failed duct leakage test mean the fabricator made a mistake?
A failed duct leakage test doesn’t always mean the fabricator made a mistake. A section can leave the shop tight, then open up at a joint during handling or installation. If a mistake was ours, we fix or remake the part at no charge.
5. Does the duct fabricator perform the leakage test?
The duct fabricator doesn’t usually perform the leakage test. Field testing is normally run by the mechanical contractor or a testing team named in the contract. The fabricator builds the duct that the drawings and spec call for.