
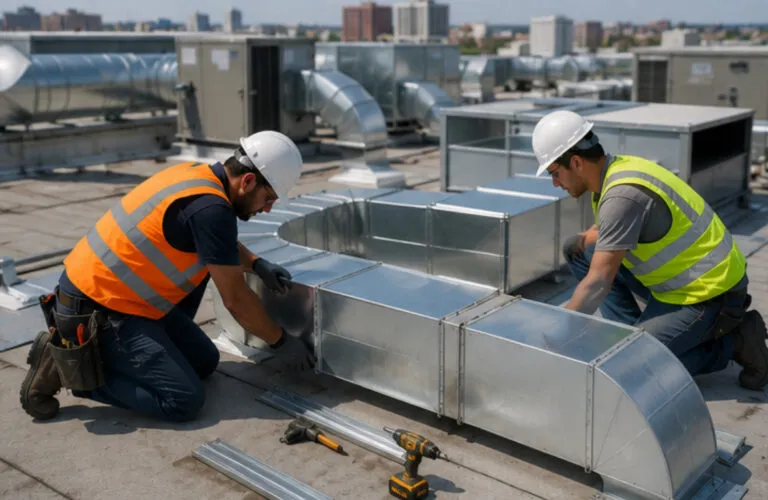
Measure it yourself when
- Both openings are reachable and square
- The duct on each side is already hung
- The drawing on hand is the current revision
- It's one transition, offset, or elbow on a single run
- A small adjustment on site is easy to make
British Columbia


A TAPE ONLY HELPS IF EVERYONE READS IT THE SAME WAY
A custom fitting starts with three measurements. Measure each opening from the inside, and the length between the two ends. Then measure how far one end sits higher, lower, or to the side of the other. Write W or H next to every size, take a photo with the tape showing, and send it to us. If you can't reach the opening, or the fitting connects to a new unit, we can quote a visit to measure it for you.
Each opening
Inside wall to inside wall, width and height
The length
From one joint to the other
The offset
How far end 2 moves, and which way

Measured already? →
Send the numbers and a few photos, and we'll tell you what's ready to quote and what still needs a check. Start a project request
Standard duct sizes and fittings price instantly on WebDuct once your company has an account.
Measure it yourself when both openings are reachable and square, and book a field measure when the fitting meets equipment or a tight space. Some runs don't need a custom fitting at all, and knowing when stock fittings work better can save you the time and effort.
A field measure is available by project and quoted separately. When we take the measurements, the fit is ours to answer for.
A custom fitting joins two things. Every measurement belongs to one end or to the space between them. These are the numbers that turn a sketch into one of our custom duct fittings.
| Measurement | What to write down | Why it matters |
|---|---|---|
| Size of each opening | Width and height, or the diameter for round | Sets the shape we cut for each end |
| Inside or outside | Which side of the duct wall you measured | Measuring the other side makes every size a little off |
| Length | From one joint to the other | Decides whether the fitting reaches without a filler piece |
| Offset | How far one end shifts, and which way | An offset with no direction can be built backwards |
| Straight side | Which side runs straight, or whether both sides slope | Keeps the fitting clear of what sits above or below |
| Connection at each end | Slip, flange, or the existing connector | Each end has to mate with what's already there |
| What each end meets | Duct, a unit outlet, a curb, or a wall opening | An equipment end needs the model number too |
| Liner or insulation | Type and thickness, if there is any | Lined duct is sized to the clear airway |
Measure from the inside wall of the duct to the inside wall across from it. That's the space the air moves through, and it's the size most drawings show. If you could only measure the outside, write "outside" next to the number so we know.
Measure from one inside wall to the other. If you can only reach the outside, measure that and write "outside", and we'll subtract the metal.
Some duct has insulation lining the inside. Measure from the face of the lining and tell us how thick it is, so we make the duct big enough to hold it.
Some duct has insulation wrapped around the outside. Ignore the wrap and measure the metal under it.
On a lined run, such as sound-insulated ductwork, always send the lining thickness with the size. Without it, the new fitting can come out smaller inside than the duct it joins.
Label both numbers every time. The order of a duct size changes with the view it's read from. On a plan view, the first number is usually the width you see from above. A section view of the same duct often lists the height first, and drawing software can flip the order again.
| What gets sent | How it can be read | What to send instead |
|---|---|---|
| "24 x 12" | 24 wide, or 24 tall | "24 W x 12 H, inside" |
| "6 inch offset" | Up, down, left, or right | "Offset 6 in. up, top to top" |
| "36 long" | Overall, or between connections | "36 in. from joint to joint" |
| "Round to square" | Either end could be the round one | "End 1 is 14 in. round, end 2 is 16 W x 12 H" |
| "About a foot" | Anything from 11 to 13 inches | The measured number, to the nearest eighth or millimetre |
These sizes show how to write a measurement and don't come from a job. Pick one unit for the whole order too. A sketch that mixes inches and millimetres gets part of the order built in the wrong one.
Even with every size right, a transition can be built facing the wrong way. Mark which end is which and which way it shifts, and that can't happen.
Name the ends. Mark end 1 and end 2 on the sketch, and draw an arrow for the way the air flows.
Measure each opening. Take the width and height, or the diameter, at each end, measuring the same side (inside or outside) at both.
Measure the length. Measure from where the fitting joins the duct at end 1 to where it joins at end 2.
Measure the offset. Say how far end 2 moves up, down, left, or right of end 1, from the same side of each opening.
Say which side stays straight. Tell us if the top, the bottom, or one side runs straight, or if both sides slope evenly.
Take photos with the tape showing. Shoot each opening straight on with the tape across it, plus one wide shot of the space.
A photo with the tape across the opening shows us the size and where you measured from, in one shot.
Straight on, tape across the opening, numbers easy to read
Taken at an angle, tape off the edge and out of focus
When a fitting meets a unit, the unit's own drawings matter as much as your tape. A curb adapter or a plenum has to match the equipment's openings, and those sizes come from the manufacturer. Send the full model number of every unit involved, plus the curb or submittal drawing if you have it. The roof curbs and curb adapters we make start from exactly those numbers.
Send the existing curb's outside and inside sizes, the old unit's full model number, and the new unit's model number with its curb drawing. The adapter joins one footprint to the other and needs both sets of numbers.
Send the unit's outlet size and where it sits on the cabinet, then each duct connection off the plenum with its size and height.
Send the duct size and whether you measured inside or outside, where the branch goes along the duct, and the branch size. Say whether it comes off the top, the bottom, or a side.
Take the outlet size from the unit's drawing, then check it against your tape. When the two disagree, send both numbers and let us sort out which one to build to.

A verify-in-field note means the drawing's number is a placeholder until someone measures the site. Designers add it when the building may not match the drawing, as often happens on renovations and older buildings. General conditions also tell the trades not to scale drawings, so a size measured off a PDF with a ruler isn't a measurement.
| Drawing note | What it tells you | What to send us |
|---|---|---|
| Verify in field (VIF) | The number needs confirming on site | Your measured number, or a booked field measure |
| Do not scale | Sizes come from written dimensions only | Written dimensions, never a ruler on the PDF |
| Clear inside or net inside | The size is the airway, inside any liner | The liner type and thickness |
| Revision letter or date | Which version of the design you're holding | The current revision, so nothing gets built to an old one |
A good photo saves a round of questions, and a poor one starts them. Photos with tape measurements are one of the four file types we quote from, along with PDF drawings, CAD files, and a hand sketch.
| Photo | When it helps | When it doesn't, and what happens |
|---|---|---|
| The opening with the tape | Straight on, tape across it, numbers readable | Taken at an angle or blurry, so we can't read the size and have to ask again |
| A wide shot of the area | Shows the beams, pipes, and duct around the fitting | Missing, so we can't see what the fitting has to clear, and it may hit something on site |
| The unit's nameplate | The model number is sharp and complete | Cropped or blurry, so we can't look up the unit's sizes |
| Photos matched to the sketch | End 1 and end 2 labelled on both | Unlabelled, so we can't tell which photo shows which end |
| Anything in the way | A beam, pipe, or sprinkler line in the shot, with a rough distance | Left out, so the fitting gets built for an empty space |
We can also draw the fitting from your photos and sketch. A drawing fee applies, and it's credited back if you place the order. The gap between a picture and a drawing has its own guide: Why Photos Are Different From Fabrication Drawings.
Each of these looks fine on the sketch and only shows up once the fitting meets the duct. One extra word next to the number heads off every one of them.
| The slip | What happens | What to send instead |
|---|---|---|
| Outside measured, not labelled | Every side comes out bigger by the metal | "Outside" written next to the number |
| Width and height swapped | The fitting turns a quarter turn on you | W and H on every size |
| Offset with no direction | The offset goes the wrong way | Up, down, left, or right, and measured from which side |
| Liner left out | The airway shrinks by the liner on each side | The liner type and thickness |
| An old drawing used | The opening moved since that revision | The current revision, or a site measurement |
| One reading on bent duct | Older duct can sit out of square | A few readings along the run, with the smallest marked |
| Units mixed | Part of the order gets built to the wrong unit | One unit for the whole order |
Your numbers go through a few checks before the first cut, and a gap gets caught on paper instead of on the roof. That holds for a single fitting and for a full HVAC ductwork package alike.
Reading the request. Our duct fitting fabricators check each number says inside or outside, which way, and which unit, then ask about any gaps.
Checking the equipment. Where a fitting meets a unit, we confirm the model and the manufacturer's dimensions.
Measuring on site, when it's booked. A field measure or a template covers openings that are tight, irregular, or out of reach.
Planning the folds. The metal's thickness and the extra each fold takes up are worked into the pattern before cutting.
Checking before release. The critical dimensions are measured again on the finished fitting before it leaves Pitt Meadows.
If a fitting doesn't fit and the mistake was ours, Duct Duct Goose fixes or remakes it at no charge. That holds whether the order was one transition or a full package.
Not every fitting needs us on site. A straight transition between two reachable openings, measured inside and labelled, is quick to do yourself. Book the visit when a wrong number would cost the job more than the trip.
Tick these before the sketch leaves your hands, and the first reply comes back as a price instead of a question. More fit and install guides sit in Field Measure, Fit and Installation. The quote checklist lives in What Duct Duct Goose Needs to Quote Custom Metalwork.
Whether your sketch ticks every box on the checklist or has two openings and a deadline, send it over. We'll tell you what's ready to cut, what needs another number, and when a visit is the better call.
Standard ductwork and fittings price instantly on WebDuct, with a company account. Stainless, kitchen exhaust, production parts, installs, and other custom work start with a request or a call.
